A & C Driving School
Cockpit Checks
Hazard Warning Lights
Locate the Hazard Warning Light button on your Dashboard.
Press the button in and the front two indicators and the rear two indicators will begin flashing together.
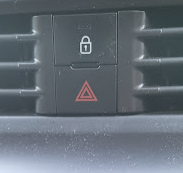
Look at the Dashboard display and you will see both indicator arrows flashing on and off together.
To switch off the Hazard Warning Lights, Press the Hazard warning light button again.

Headlights (Dip Beam)
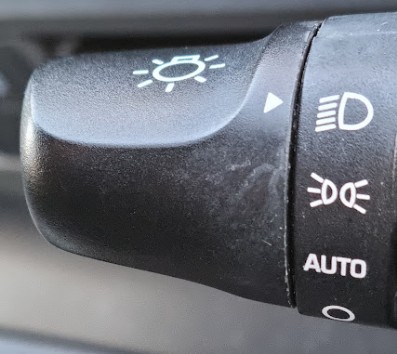
There are usually four settings on the Headlight switch.
By turning the selector you can select the appropriate setting
1) Headlights OFF
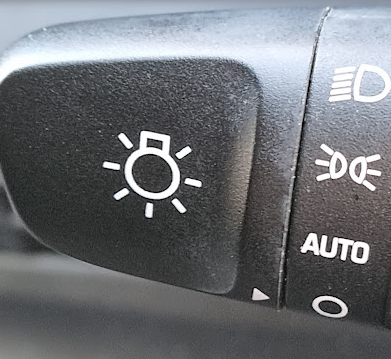
2) Automatic Headlight setting
This setting allows the Headlights to come on Automatically when the ambient light outside falls below a certain level
For example Dusk or driving into an underground carpark
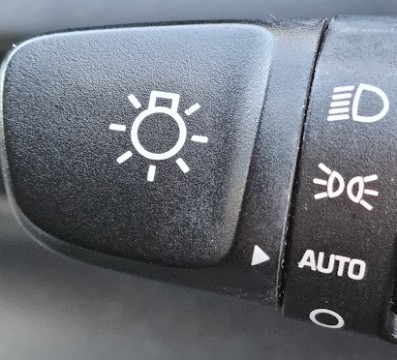
3) Parking Lights ON
This setting is used when you have pulled in to the side of the road and intend to be there for a period of time. By turning on the parking lights also known as the Side Lights, oncoming cars can see you are parked and can also see beyond your car for any other cyclists or vehicles approaching without being blinded by your headlights.
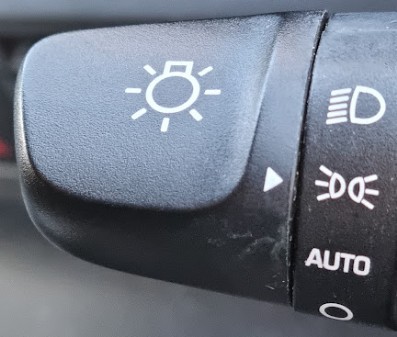
4) Headlights ON (also known as the Dip Beam)
This setting is used for normal driving in normal driving conditions. It is recommended that when driving even during daylight that you drive with your Headlights on. This makes you much more visible to oncoming vehicles.
Signals or Indicators
Locate the Signal (also known as the Indicator) lever usually on the side of the Steering wheel column.
By pushing this lever Up or Down the relevant signal indicator will appear on the Dashboard display screen


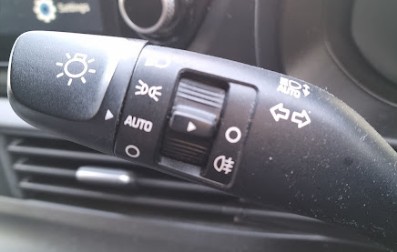
To activate the Main Light (also known as the High Beam)
Depending on the make and model of the vehicle,
To activate the Main Light or High Beam you can either push the signal lever away from the steering wheel or pull it closer to the steering wheel.
When the Main Light or High Beam has been activated, look at the Dashboard Display Screen and you will see this symbol.
To deactivate the Main Light or High Beam, just reverse the above action.
This setting is used when driving at night in an unlit area (example: in the countryside)
By using this setting incorrectly, it may have the effect of Blinding or Dazzling other drivers.
Here are some examples when this setting must not be used.....
1) driving behind another vehicle
2) when there are any oncoming vehicles
3) approaching a sharp bend
4) approaching a Hump Back bridge

To Activate the Fog Lights (if provided on the vehicle)
1) Locate the switch or button that displays the Fog Light Symbol.
2) Turn it on and on the Dashboard Display Screen the Fog Light Symbol will be highlighted.
This setting must only be used when driving in Fog or Heavy Snow. Be sure you have switched off the Fog Lights when they are not needed.

The Front and Rear Window De-Misters
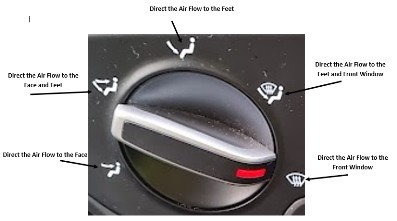
To clear the mist from the inside of the Front Window
1) Locate the Directional Indicator and turn it to the Front Window as shown here.
2) Turn on the power control to full.
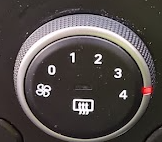
3) Turn on the A/C if provided in the vehicle.

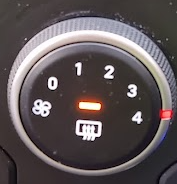
4) Locate the button or switch showing this symbol and turn it on.
5) The rear window de-mister is not a fan, but is a heater and may take a little longer to clear.
The Wipers
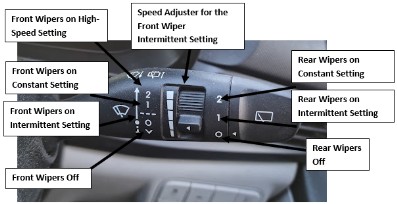
1) Locate the lever that operated the Wipers.
2) Activate the wipers to the desired setting as shown here.
3) The window washer is also activated using this lever,
a) By pulling the lever closer to the steering wheel or pushing it further away.
b) By operating a switch or button located on the wiper lever.
The Car Horn
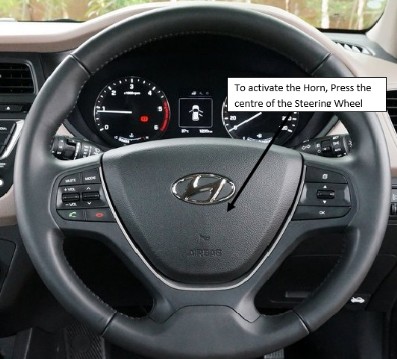
The Car Horn is located on the centre of the steering wheel.
Click here for a printable version
